Imagine the joy of nurturing a humble plant that flourishes in your home. It also gifts you new life through its offshoots. For many plant enthusiasts, spider plants are more than just greenery. They represent connections, memories, and the joy of watching something grow under your care.
Discovering how to propagate spider plants in water is thrilling. It transforms tiny spiderettes into robust new plants. In just a few weeks, you’ll see roots form, symbolizing growth and potential. This process is exciting for both the plant and you.
Whether you’re a seasoned gardener or just starting, this guide will help. It will show you how to water propagate, ensuring your indoor garden blooms. It will also deepen your love for nurturing life. You can also watch the video above to see step-by-step how I propagate spider plant in water:
Key Takeaways
- Spider plant propagation in water typically allows roots to form within seven to ten days.
- Optimal growth for spider plants requires temperatures above 50°F and indirect light.
- Regular watering is essential, usually once a week, except during the cooler months.
- Choose the right spiderette for propagation; trim excess spiderettes to promote health.
- Understanding the root formation in water can lead to better success in transplanting.
- Spring and summer are the best seasons for successful spider plant propagation.
Introduction to Spider Plants
Spider plants are loved for their characteristics. They have long, arching leaves that look like grass. They also grow well in many indoor places.
These plants come from South Africa. They like warm places, doing best when it’s over 50°F. They need bright, indirect light to grow well and show off their green and white stripes.
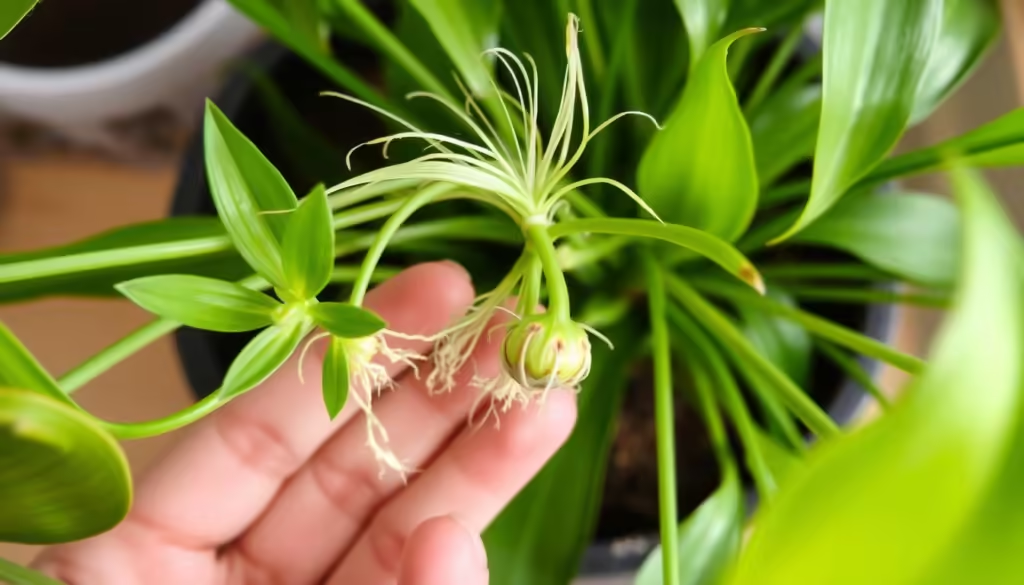
One cool thing about spider plants is how they make new plants. These are called spiderettes, spiderlings, or pups. They grow on long stems and are easy to start new plants from.
Spider plant care means keeping the soil moist but not too wet. Water them every two weeks. They can also handle some dry spells.
Spider plants can be started any time of the year. But spring and summer are the best times. It usually takes two to four weeks for roots to grow.
Knowing how spider plants work helps you take care of them. This way, they can be happy and healthy in your home.
Benefits of Propagating Spider Plants
Propagating spider plants has many advantages. It’s a cost-effective way to grow more plants from what you already have. This method lets you expand your indoor garden without spending a lot of money.
It’s also easy for beginners to propagate spider plants. This process can be fun and educational, especially for families. It’s a great way to teach kids about plants and how they grow.
Sharing spider plants with friends and family is rewarding too. It shows you care and are thoughtful. Your gardening skills and kindness shine through when you give plants to others.
Watching the roots grow during water propagation is exciting. These roots might be a bit fragile, but they show how plants grow. By propagating spider plants, you help create a lush, green space indoors.
Materials Needed for Spider Plant Propagation
To successfully propagate spider plants, you need the right materials. Start with a healthy mother spider plant. This will be your source for cuttings. It’s important to use clean, sharp scissors for precise cuts.
Next, get clean glass jars or containers filled with water. These will hold your cuttings and let you watch root growth. Keeping your workspace clean and organized is key to prevent harm to the cuttings. Root hormone can also help with root development, though it’s optional.
Here’s a list of what you’ll need:
- Healthy mother spider plant
- Clean, sharp scissors or pruning shears
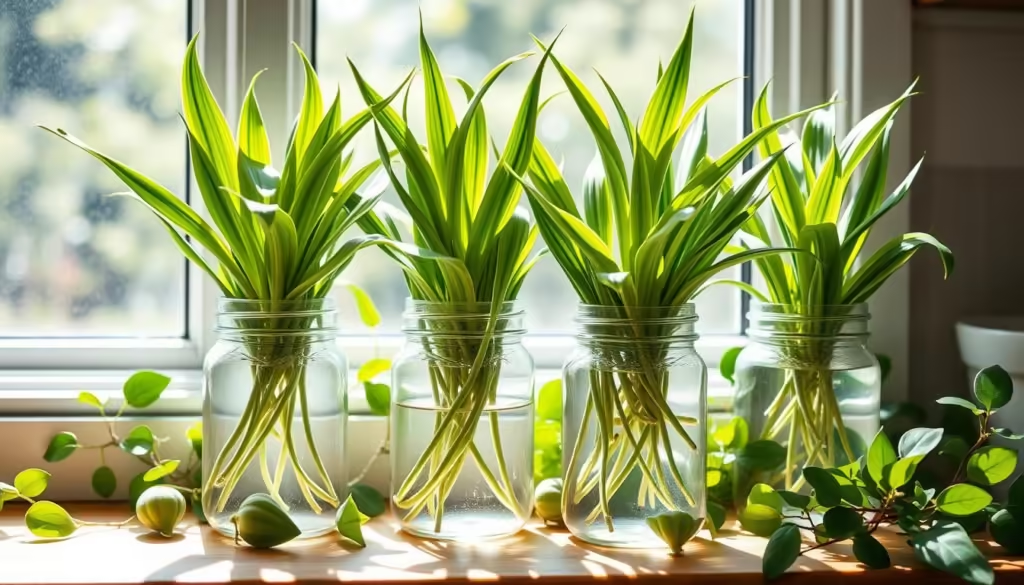
- Clean glass jars or containers filled with water
- Optional: Rooting hormone
Before you begin, make sure everything is clean. Using clean supplies will help your cuttings grow strong and healthy.
| Material | Purpose |
|---|---|
| Healthy spider plant | Source of cuttings |
| Scissors or pruning shears | For cutting off spiderettes |
| Glass jars or containers | To hold cuttings in water |
| Rooting hormone (optional) | To support faster root development |
Choosing the Right Spiderette for Propagation
Choosing the right spiderette for propagation starts with checking their health and size. Look for healthy pups that are at least 2 inches long and have multiple leaves. Spiderettes ready for propagation show small roots or brown nodules.
When cutting the spiderette, do it just below the roots. This way, the cutting gets nutrients from the mother plant. Spring and summer are the best times to propagate because the plants are growing fast.

| Criteria | Recommendations |
|---|---|
| Length | At least 2 inches |
| Leaves | Minimum of five healthy leaves |
| Root development | Small roots or brown nodules visible |
| Optimal seasons | Spring and summer |
| Health check | No signs of wilting or discoloration |
By following these tips, you can successfully propagate spider plants. Watch for root growth in the right environment. This will help your new plant thrive.
Steps for Spider Plant Propagation in Water
To successfully grow spider plants in water, you need to follow some important steps. These steps help you watch the roots grow and make sure they’re healthy when you move them to soil. Here are the key steps for spider plant propagation, focusing on getting the right supplies and preparing the spiderette well.
Gathering Your Supplies
First, make sure you have these important items:
- Water-filled containers (clear glass is best for seeing the roots)
- Sharp, sterilized scissors
- Optional rooting hormone
Preparing the Spiderette Cutting
Being careful when you cut the spiderette is crucial for success. Here’s how to prepare the spiderette:
- Use sterilized scissors to cut the spiderette at the base. Be careful not to hurt any roots.
- Take off any leaves that might get wet. This stops rot.
- Put the cutting in the water container, making sure the roots are covered. Don’t let leaves touch the water.
Keep the container in a spot with bright, indirect light. This helps the cutting grow well. Also, change the water every few days to keep it fresh and prevent root problems.
Optimal Conditions for Water Propagation
To successfully grow spider plants in water, you need to focus on a few key areas. Paying attention to water quality and lighting is crucial. This will help your cuttings grow strong and healthy.
Choosing the Right Water
Choosing the right water is vital for growing spider plants in water. Distilled or rainwater is best because it doesn’t have additives that can harm roots. If you must use tap water, let it sit for an hour to remove chlorine.
Changing the water regularly is also important. Do this every week to keep your plants thriving. If the water becomes cloudy or you see algae, it’s time for a change.
Lighting Requirements
Lighting plays a big role in water propagation. Your plants need bright, indirect light to grow well. Too much direct sunlight can burn them, while not enough can slow their growth.
Place your plants in a spot with plenty of light but not too harsh. Keeping the temperature between 65°F and 75°F also helps them grow strong.

| Water Type | Recommended Usage | Notes |
|---|---|---|
| Distilled Water | Best for rooting | No chemicals, ideal for all stages of growth |
| Rainwater | Excellent choice | Natural, nutrient-rich, free from chlorine |
| Tap Water | Acceptable with precautions | Let sit for at least 1 hour; may contain chlorine or fluoride |
By paying attention to these details, you can create the perfect environment for your spider plant cuttings. This will help them grow strong and healthy.
How Long to Propagate Spider Plant in Water
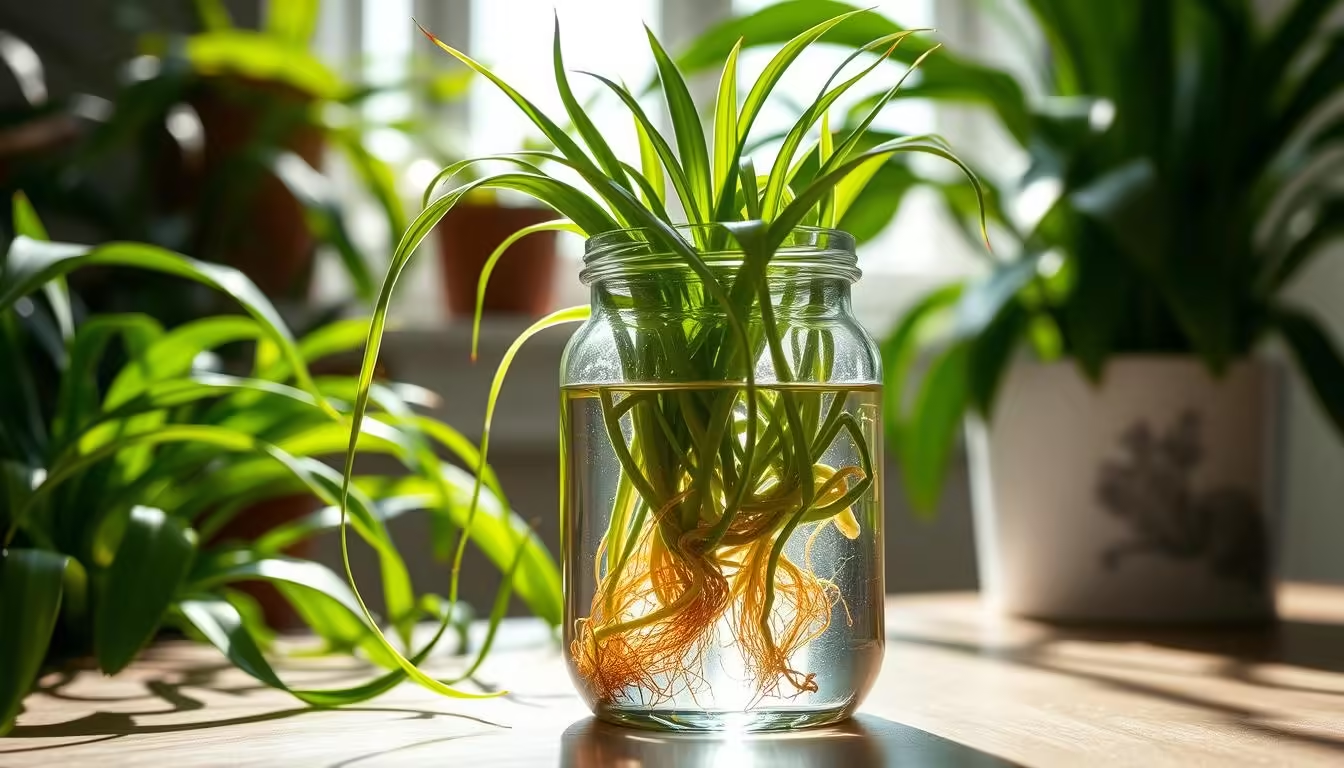
Patience is key when propagating spider plants in water. Roots usually start forming in seven to ten days. Keep your spiderette cuttings in the right spot, with good water and light.
Watch for roots after a week. New roots at the base mean things are going well. Roots should be about two to three inches long before moving to soil. This usually takes one month.
Roots from water might be weak. So, it’s important to slowly get them used to soil. Keep the light bright and the soil moist for healthy growth.
Transferring Roots to Soil
When your spider plant roots are strong, it’s time to move them to soil. Choose a pot with holes to avoid water buildup. Use a soil mix that drains well to help your plant grow.
Make a hole in the soil that fits the roots well. Keep the cutting’s original depth the same. Place the plant in the soil and water it lightly. This helps prevent root rot from too much water.
Put your plant in a warm spot with indirect sunlight. This helps it adjust without stress. Watch your plant for signs of trouble, like droopy leaves. These steps will help your spider plant thrive.
| Step | Action | Purpose |
|---|---|---|
| 1 | Select a pot with drainage holes | Prevents water logging |
| 2 | Fill pot with well-draining soil | Supports healthy root growth |
| 3 | Create a hole for roots | Accommodates the cutting’s original depth |
| 4 | Lightly water after planting | Provides initial moisture |
| 5 | Place in warm, indirect light | Encourages acclimatization |
| 6 | Monitor for signs of stress | Ensures plant health and quick intervention |
Spider Plant Care During and After Propagation
Proper care for your spider plants is key for their health. Focus on watering and soil needs, and watch their growth and health. Good practices now help young plants adjust to their new home.
Watering and Soil Needs
Keep the soil moist but not too wet when watering spider plant cuttings. Let the top inch of soil dry before watering again, especially in winter. Spider plants do well in well-draining soil that holds moisture without being soggy.
Monitoring Growth and Health
Check your spider plants often for signs of growth, like new leaves or strong roots. If you see wilting or brown leaves, check your watering and light. Start fertilizing when you see new growth, usually in one to three months. This keeps your spider plants healthy and growing.
Common Mistakes in Spider Plant Propagation
Starting your spider plant journey? Avoiding common mistakes is key to success. Fixing these errors early saves time and effort. Here are the main mistakes in spider plant care to steer clear of:
- Overwatering: This can cause root rot, especially in young cuttings. Water gently and let the top 1-2 inches of soil dry out before watering again.
- Insufficient Light: Spider plants need bright to medium light. Without enough light, they grow slower.
- Neglecting Water Quality: Tap water can harm young plants. Use fresh, clean water to prevent brown tips on leaves.
- Waiting Too Long to Transplant: Moving spiderettes to soil on time is important. Waiting too long can slow growth.
- Overfertilizing: Too much fertilizer can damage plants. Fertilize once or twice a month when they’re growing.
By avoiding these tips to avoid spider plant problems, you can help your plants thrive. Remember, good drainage prevents root rot. Keeping your indoor temperature between 65 and 85 degrees Fahrenheit also helps.
| Mistake | Impact | Prevention Tip |
|---|---|---|
| Overwatering | Root rot | Water when the top 1-2 inches of the soil dries out |
| Insufficient Light | Slower root development | Provide bright to medium light |
| Overfertilizing | Plant damage | Fertilize once or twice a month |
| Neglecting water quality | Dried, brown tips on leaves | Use clean, chemical-free water |
| Delaying transplant | Stunted growth | Transplant timely |
Conclusion
Learning how to propagate spider plants in water is very rewarding. It can make your indoor garden much better. By following this guide, your spiderettes will grow strong roots quickly. This simple process lets you grow more plants and share them with others.
For spider plant care, keep the light and water right. These are key for your plants to grow well. Water them once a week in summer and every 2-3 weeks in winter. Following these tips, your spider plants will do great indoors, even with different humidity levels.
Propagating spider plants makes your space look better and improves air quality. It removes toxins from the air. With a little effort, your spider plants will show off your new skills in growing and caring for them.
FAQ
Can you propagate a spider plant in water?
How long does it take to propagate spider plant in water?
What materials do I need for spider plant propagation?
How do I choose the right spiderette for propagation?
What are the optimal conditions for water propagation of spider plants?
When is the best time to propagate spider plants?
How do I know when to transplant spider roots to soil?
What common mistakes should I avoid during spider plant propagation?
How do I care for spider plants during and after propagation?
Want To Learn More, Check Out These Links:
- How to Propagate a Spider Plant from Cuttings
- 5 Ways to Propagate a Spider Plant
- Propagating Spider Plant: Step-by-step Guide 👶
- How To Propagate Spider Plants In Water Or Soil (5 Easy Steps!) – Get Busy Gardening
- How to propagate spider plants easily in water, including babies!
- How to Propagate Spider Plants to Increase Your Collection
- The Lazy Person’s Guide to Spider Plant Care
- How to Grow Spider Plants
- Lifestyle: How I Propagate Spider Plants
- How to Propagate Your Curly Spider Plant
- How to Propagate Baby Spider Plants: The 4 Best Methods
- Flora | Spider Plant Propagation Made Easy: How to Propagate Spider Plants in Water
- Water Propagation Made Easy: Tips and Tricks for How to Propagate Plants in Water
- Plant Care 101: What Is Water Propagation? – Foliaire Inc. Boston MA
- 🌱 Propagating My Green Orange Spider Plant: Step-by-Step Guide
- How to grow spider plants / RHS Gardening
- How to Grow Spider Plants That Sprout Lots of “Babies”
- Wild Interiors — How to Care for a Spider Plant (+ Propagation Tips!)
- Essential Spider Plant Watering Tips | Mavyn
- Spider Plant – Aztec Plants

